
Self-Guided EXPLORATION
Evergreen Arboretum SELF-GUIDED EXPLORATION for kids, families and school groups
Observe, create, and learn on your own. Have fun and go explore!
Jump to:
Downloadables and Scavenger Hunts
Things To Make
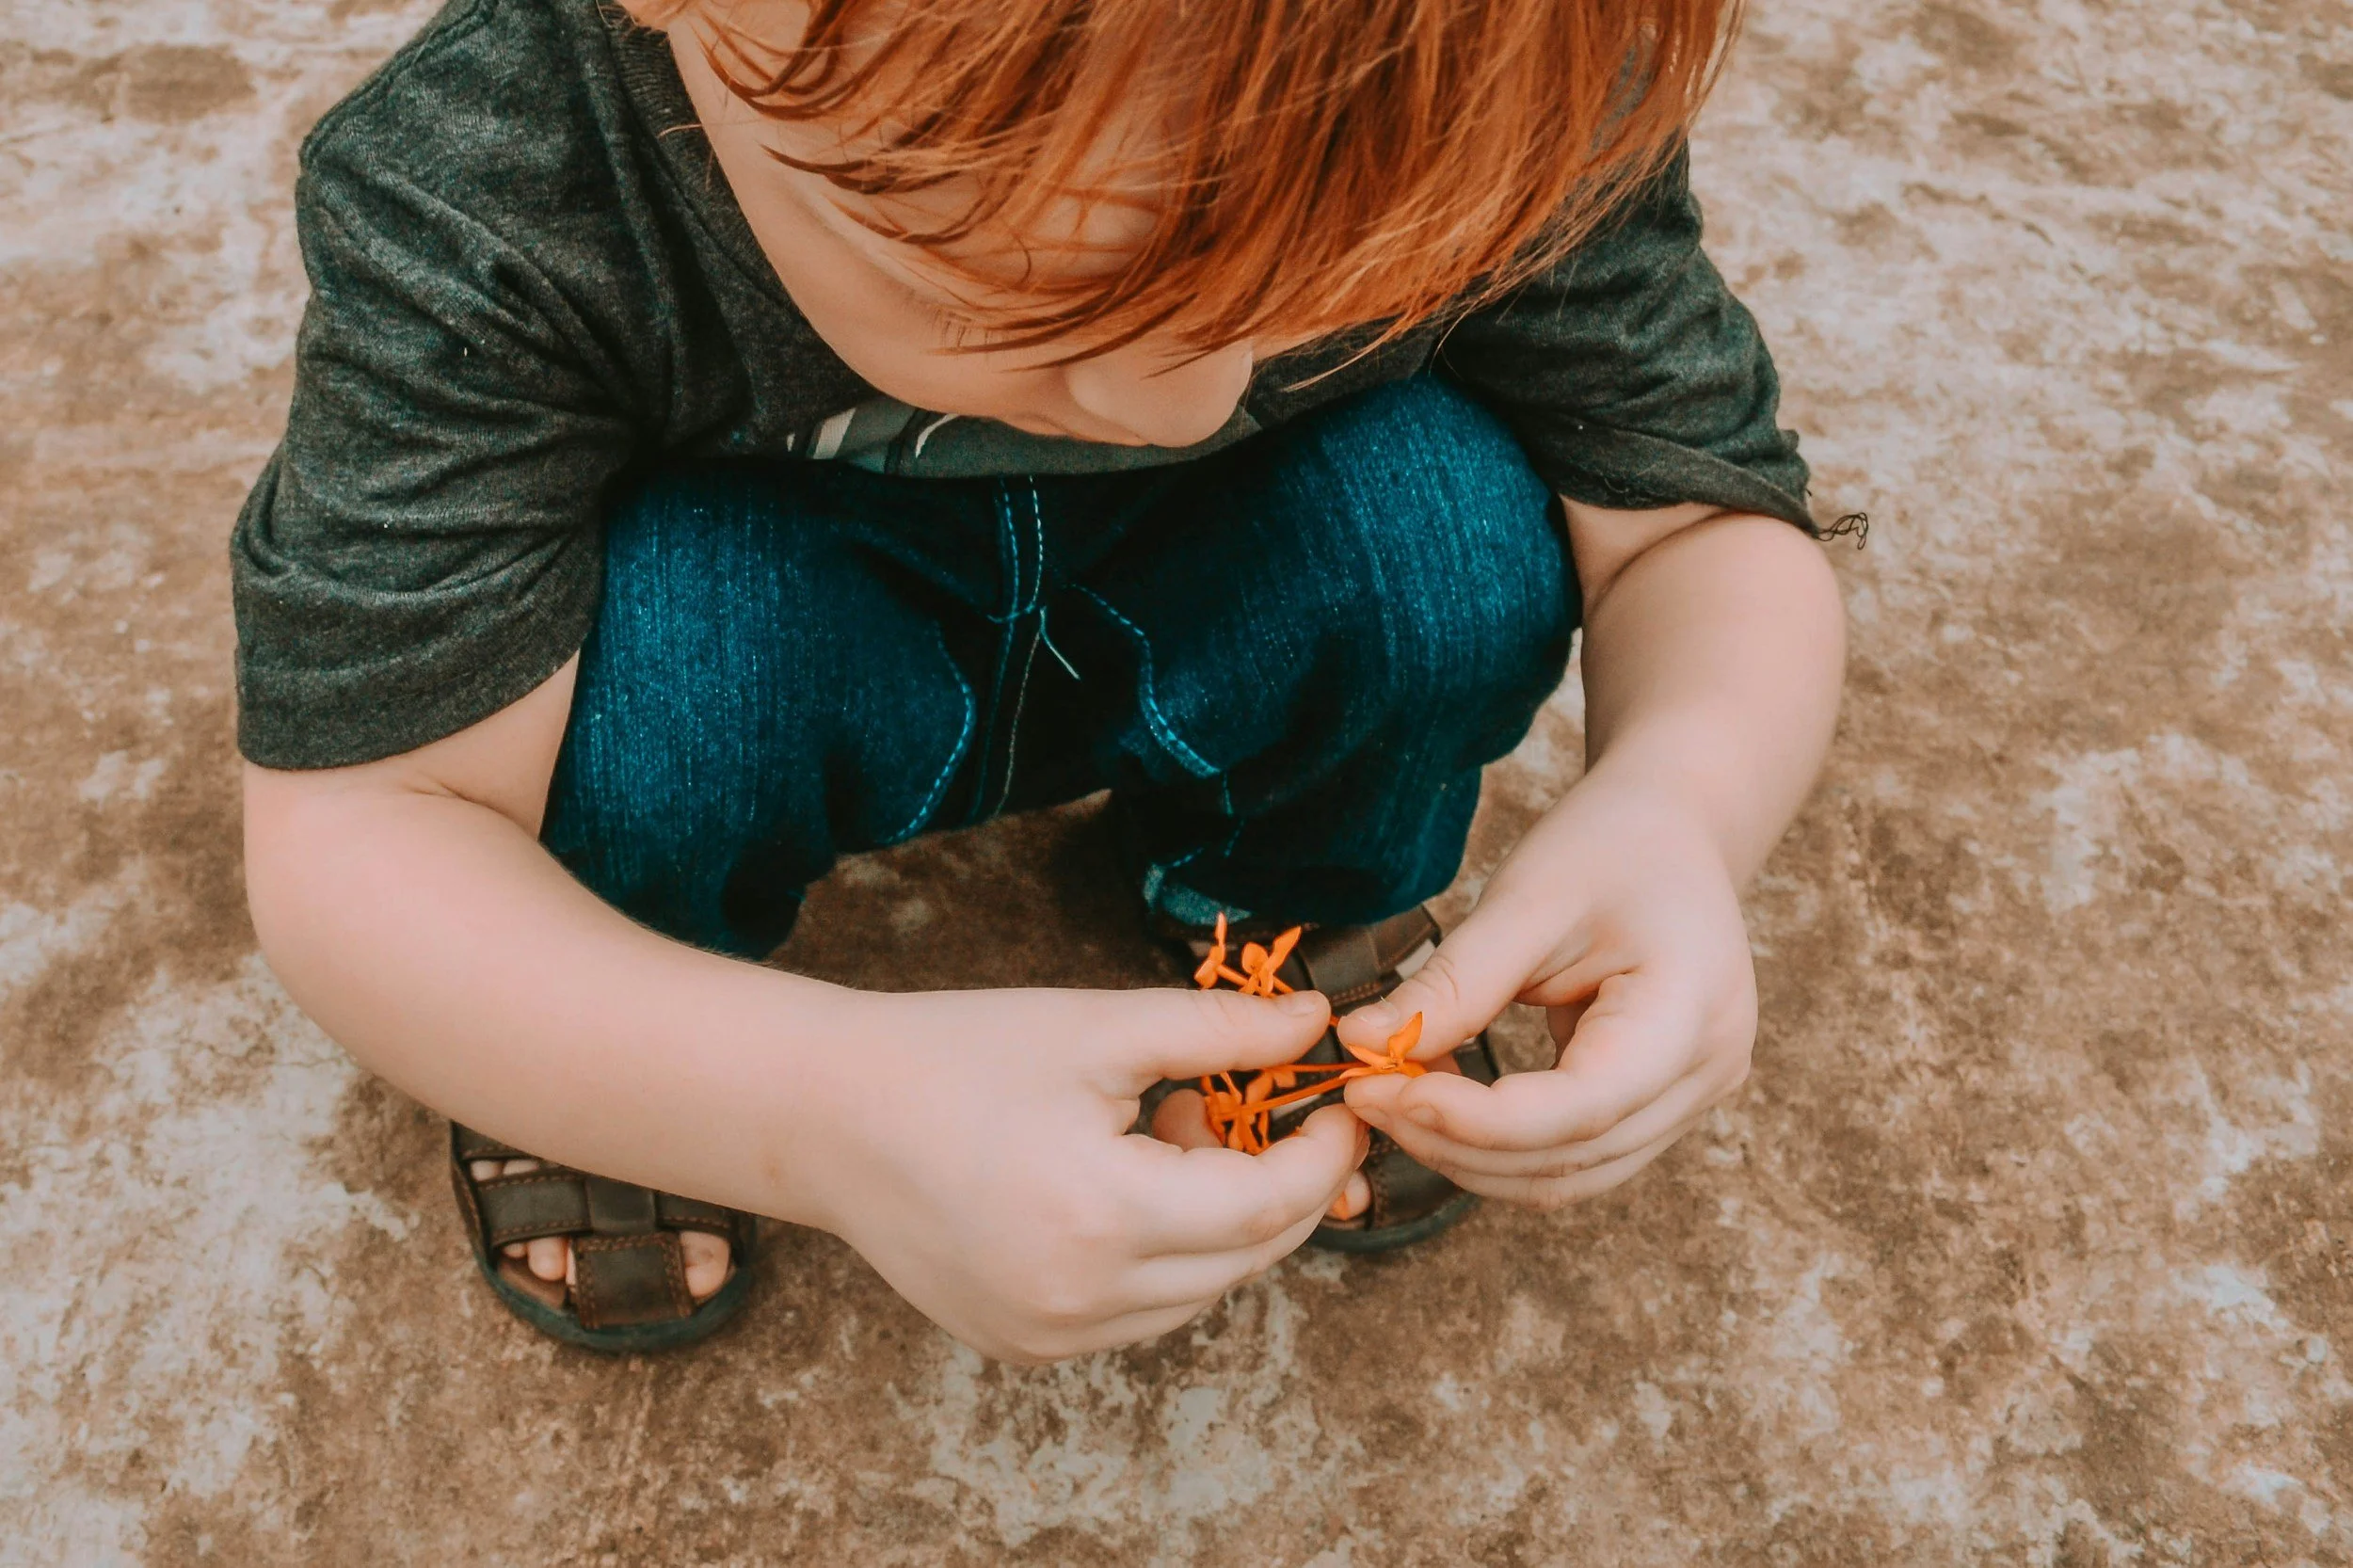
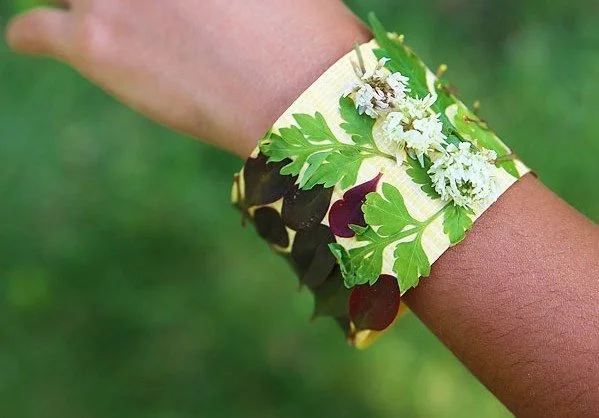
Nature Bracelets
OVERVIEW: This is a fun, easy activity to do with a child of any age, and in any season.
MATERIALS:
Painters tape, Masking tape, or duct tape
Small natural items (leaves, grass, twigs, fallen petals, seeds, acorns, feathers)
INSTRUCTIONS:
Prepare the tape: Tear off a piece of tape long enough to go around your wrist. Wrap it around your wrist with the sticky side facing out, securing the ends to each other to form a bracelet.
Collect treasures: Go explore the Arboretum to find small, interesting items.
Decorate the bracelet: Gently press the collected natural items onto the sticky surface of the tape.
Repeat and create: Continue adding items, exploring different textures, colors, and sizes to fill the bracelet.
Note: Collect only fallen items or things found on the ground.
FOCUSING THROUGH PHOTOGRAPHY
OVERVIEW: Letting your child use a camera or Smartphone is another way to get them to observe and experience the Arboretum.
MATERIALS:
Camera (phone, digital, slr)
SUGGESTED ACTIVITIES:
Experiment with different viewpoints by photographing subjects from above or below, find shapes and patterns in nature, and use your child’ photos to make a collage or map of their environment.
Nature Photo Scavenger Hunt: Create a list of specific things for kids to photograph, such as "something red," "an interesting texture," or "a bird's nest".
Nature Map: Ask children to take at least 10 photos of natural features in the Arboretum then use the photos to create a map on paper.
20-Step Nature Photos: During a walk, have kids stop every 20 steps and take a picture of a nature-related item around them.
Seasonal Photos: Encourage children to take pictures of the changing seasons, from spring blossoms to colorful fall leaves.
Focus on Details: Challenge kids to photograph close-ups of leaves, bark, insects, or water droplets to capture textures and shapes.
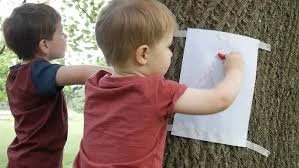
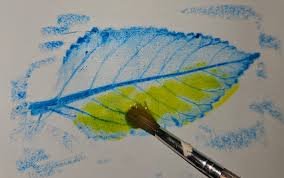
TREE BARK AND LEAF RUBBING
OVERVIEW: Bark and leaf rubbings are a great way to keep track of the trees you observe. Use a guide book or a phone app to help you identify and learn about all the trees you see.
MATERIALS:
Plain white paper
Clipboard, hardcover book, or other hard surface
Crayons with the wrappers removed
INSTRUCTIONS:
Close your eyes and feel the bark of the trees. How does it feel? Is it smooth or rough? Place your paper flat against the bark of a tree in an area with no branches. It's easier to take rubbings of bigger trees.
Place your paper on the surface of the tree. Hold paper with one hand or get a friend to hold the paper. Then gently rub the long side of the crayon over the paper on the surface of the tree. What do you see?
Now If you can, find a leaf (or needles, which are the leaves of evergreen trees) of the tree. Place the leaf against a hard, smooth surface (your clipboard),use the same paper with which you made the bark rubbing. Place the leaf underneath the paper in a blank area, then rub the crayon over the leaf with the side of your crayon Do you see a leaf print appear?
Record the name of the tree on your paper
Start a NOTEBOOK to keep track of your TREE COLLECTION. Notice the different bark and leaf shapes that you are collecting. Can you find other trees that are the same as the one(s) that you made rubbings of? Can you find these trees in your neighborhood.
Additional ideas: Make a Crayon leaf rubbings with a crayon and then paint over the crayon with watercolors.
Adopt a Tree - Find a tree, do a bark/leaf rubbing, collect a leaf and find the seed, draw a picture of your tree, write a story.
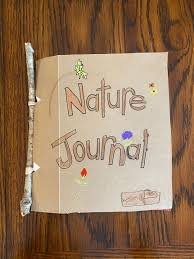
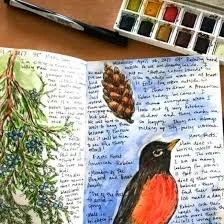
NATURE JOURNALING
OVERVIEW: Draw and write about what you see in the Arboretum. All you need is some paper and something to write and draw with. Here is one way to make a Nature Journal.
MATERIALS:
Several sheets of paper (blank, lined, or mixed media for painting)
Two slightly larger pieces of cardboard or thick cardstock for the covers
A hole punch
Small stick, Twine, yarn, or ribbon, rubber bands for binding
Scissors
Optional: crayons, colored pencils, watercolors or markers for illustrating
INSTRUCTIONS:
Cut the pages and covers. Ensure your paper pages and cover material are cut to the same size and are square or rectangular. The covers should be slightly larger than the pages to protect the edges.
Stack and punch holes. Carefully stack your pages inside the covers, aligning them as evenly as possible. Punch at least two holes along one side of the stack, about an inch from the edge. For larger journals, punch three holes.
Bind the book. Place the stick by the holes. Cut a length of yarn or twine for each hole. Thread the yarn through the corresponding holes in the covers and pages, then tie a secure knot or bow to hold everything together to the stick. Using a shoelace knot will allow you to untie it easily to add more pages later.
Decorate the cover. Personalize your journal by decorating the front and back. You can draw, paint, or glue on natural items you've collected, like pressed leaves or bark.
Ideas for your journal entries:
Your journal can be as creative or as structured as you like.
Written observations: Record the date, time, and location of your entry. Note the weather and the things you see, hear, or smell.
Drawings and diagrams: Sketch plants, animals, clouds, or landscapes. Focus on details like shape, size, and color to sharpen your observation skills.
Leaf and bark rubbings: Place paper over a leaf or piece of tree bark and rub a crayon or pencil across it to capture the texture.
Collected specimens: Tape or glue small, pressed items like leaves, flowers, or feathers onto your pages.
"I Notice, I Wonder, It Reminds Me Of" prompts: Write down what you notice, the questions it makes you wonder, and what it reminds you of.
Photography: Take photos of interesting finds and print them to add to your journal.
Creative writing: Write poems, stories, or thoughts inspired by your time in nature.

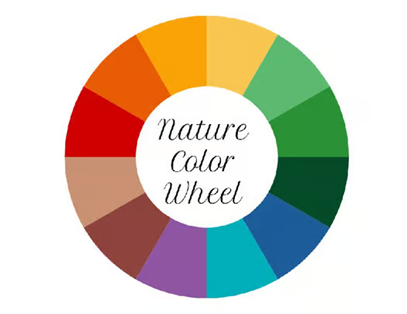
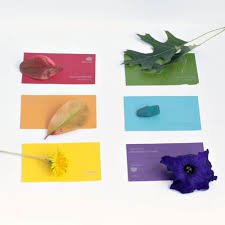
FIND COLOR IN NATURE
OVERVIEW: A color wheel nature hunt encourages outdoor exploration for any age at any time of year. Its an easy and fun way to focus on the colors around us.
MATERIALS: Nature Color Wheel (download), or a white paper plate, crayons or paint chips
(Optional) clothes pins, tape or paper clips
INSTRUCTIONS:
Here are several ways to make a color wheel. The simplest way is to download and print our color wheel, or use crayons and a white paper plate to draw a color wheel by coloring one inch squares of color around the rim of the paper plate or visit a paint store and pick a rainbow selection of color chips.
Walk through the Arboretum to discover colors in nature that match your color wheel or color chip. Work as a team to find an object that matches each color on the wheel or paint chip, or hunt at your own pace in this open-ended activity.
If you have tape or a clothes pin you can collect fallen colors and attach them to the color wheel.
Additional ideas: Find your Favorite Color. Do you know that birds and insects have favorite colors? Read more about the importance of color on our Pollinator Sheet . After reading the Pollinator Sheet can you find a hummingbird’s favorite color?
Games to play
“I SPY” WITH MY NATURE EYE
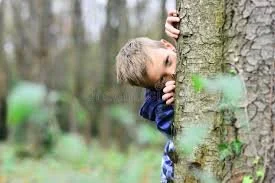
OVERVIEW: Animals use their sense of sight for taking in information about the world around them. Humans are no different! Practice your observation skills in this fun game that can be played anywhere in the Arboretum.
HOW TO PLAY:
You need at least two players.
One player starts the game off by picking an item in nature that can be seen from the spot the players are seated. They should not reveal what the item is, the other players need to guess it!
Once the player has selected an item, they start by saying “I spy with my nature eye something _________” filling in the blank with whatever color or shape the item is.
The other players take turns guessing what the item is by looking for objects that color or shape. Players should not need to move to find the object. It should be visible to all players from the same spot.
Example:
Player 1: I spy with my nature eye something red/round.
Player 2: Is it the berry growing in the tree?
Player 1: Nope, guess again.
Follow Up Questions
What was the most common color when you played?
Was it the most difficult thing to spot, why?

FIVE SENSES OF NATURE
OVERVIEW: Playing sensory nature games is important because it helps develop a deeper connection to the natural world by engaging all five senses.
HOW TO PLAY:
Games for developing SOUND recognition:
Gather natural items like pinecones, leaves, and rocks. Make a noise with one item while someone with their eyes closed tries to guess what it is.
Bird Song or Animal Sounds:
Walk and focus on listening for specific natural sounds, such as birds chirping or leaves rustling or water running
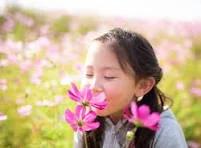
Games for Developing SMELL:
Scent Hunt: Walk through the Arboretum, look for and identify different smells, like the sweetness of flowers, the mustiness of dirt, or the scent of pine.
Flower Perfume Test: Smell different flowers to see which have the strongest or most pleasant scents.
Games for Developing TOUCH:
Nature Touch Hunt: Create a list of items with distinct textures, such as smooth stones, rough bark, soft moss, or spiky pinecones, for participants to find and feel.
Barefoot Exploration: Take off your shoes and walk barefoot in the grass to experience the feel of the earth, grass, and dirt.
Tree Feel: Explore different parts of a tree, such as the bark, leaves, and branches, to feel their unique textures

TINY TREK
OVERVIEW: In this adventure, we will go on the world’s tiniest trek to see what things we might be overlooking on the ground.
MATERIALS: Measuring tape (optional) Magnifying glass (optional)
HOW TO PLAY:
Pick a place in the Arboretum that’s slightly off the beaten path. Try a mulchy area in the Japanese Maple Grove, or a shady spot in the grassy area of the Backyard Garden. Measure out about 3 feet on the ground. This is your new trail. If you don’t have a tape measure, use the full length of your adult’s arm.
Let’s get down to a bug’s eye view. Kneeling down at one end of your trail, use your fingers to comb through the grass, mulch, leaves, etc. What is something you see that you didn’t expect? Continue along your trail, looking carefully to notice as many things as possible.
Use your magnifying glass to take a closer look. What living things made their home on this trail? What is the most unique shape that you found?
How did your other senses help you explore? Describe something you heard, something you felt, and something you smelled. What tiny things might you be overlooking near your front door?
CLOUD GAZING
OVERVIEW: Cloud gazing with kids is a simple, relaxing activity. It’s imaginative and educational. Learn simple meteorology by recognizing the different cloud shapes
HOW TO PLAY:
Start by lying in grass on your back, look up at the clouds and find one that catches your eye.
Identify and describe: Take turns pointing to the cloud and sharing what you think it looks like, such as an animal, a building, or a familiar object. You can start by offering a suggestion, like, "I see two round ears—that cloud looks like a bear!".
Tell a story: Imagine what that cloud animal or object is doing. Where is it going? What is it doing in the sky?.
Get creative: You can expand the activity by:
Drawing: Have your child draw the cloud shape and write what it looks like.
Guessing: Share your drawing with family members and see if they can guess what the cloud was.
Matching feelings: Try to find cloud shapes that represent different feelings. Want to sneak in a little learning? While you’re cloud gazing, talk about the different types of clouds. Your kids don’t need a meteorology degree… just some fun names and cool facts.
Here’s a quick cheat sheet:
Cumulus: Big, fluffy, and white. They’re the ones that look like cotton balls.
Stratus: These are flat, blanket-like clouds that cover the sky like a gray sweater.
Cirrus: Wispy and feather-like, way up high.
Nimbus: These bring the rain! Dark, thick, and moody.
You can even challenge your kids to “forecast” the weather based on what they see. Are those towering cumulus clouds getting darker? A storm might be on the way!
Suggested Reading:
Little Cloud and the Magic of Rain by Jonathon Adams,
Shapes in the Sky: A Book about Clouds by J. Sherman
ABC NATURE WALK
OVERVIEW: A simple game that encourages your children to explore their surroundings and discover new items while learning the alphabet.
MATERIALS: Letters of the Alphabets on a sheet of paper. You can download ours.
HOW TO PLAY: Have your child look for natural objects that begin with each letter of the alphabet. Check the letter off when you find an object that starts with that letter. For example, find an acorn for "A," a butterfly for "B," a caterpillar for “C,” Go explore
Suggested Reading: one of Mrs. Peanuckle’s Alphabet Book series for preschool children.